Installing Windows 10 on your computer might seem daunting, but it’s actually quite straightforward when you break it down into simple steps. Whether you’re setting up a new computer or giving your old one a fresh start, this guide will walk you through the entire process – from creating installation media to setting up user accounts the right way.
What You’ll Need Before Starting
Before we begin, gather these essential items:
- USB flash drive (8GB or larger) – This will hold your Windows 10 installation files
- Stable internet connection – For downloading Windows 10 and updates
- Windows 10 product key (if you have one) – Though you can install without it and activate later
- Backup of important files – Always backup your data before installing a new operating system
Part 1: Creating Your Windows 10 Installation Media
Think of this USB drive as your key to installing Windows. Here’s how to create it:
Step 1: Download the Media Creation Tool
- Open your web browser and go to Microsoft’s official website
- Search for “Download Windows 10” or go directly to the Windows 10 download page
- Click “Download tool now” to get the Media Creation Tool
- Save the file to your computer (usually in your Downloads folder)
Step 2: Create the Bootable USB
- Run the Media Creation Tool – Double-click the downloaded file
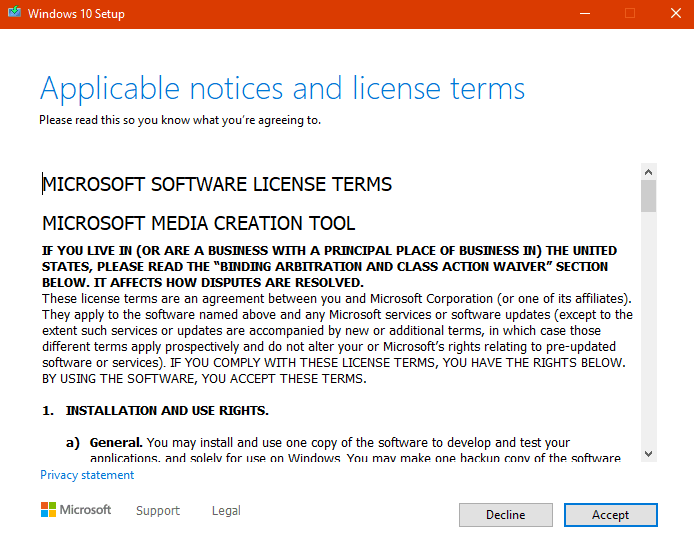
- Accept the license terms when prompted
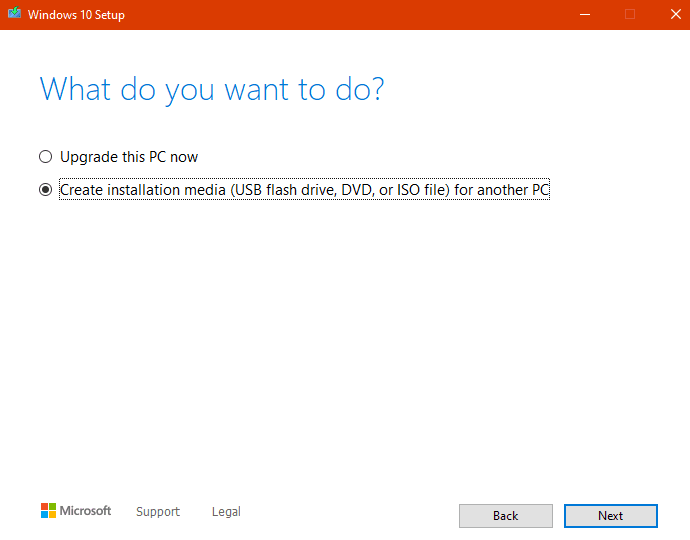
- Choose your option – Select “Create installation media (USB flash drive, DVD, or ISO file) for another PC”
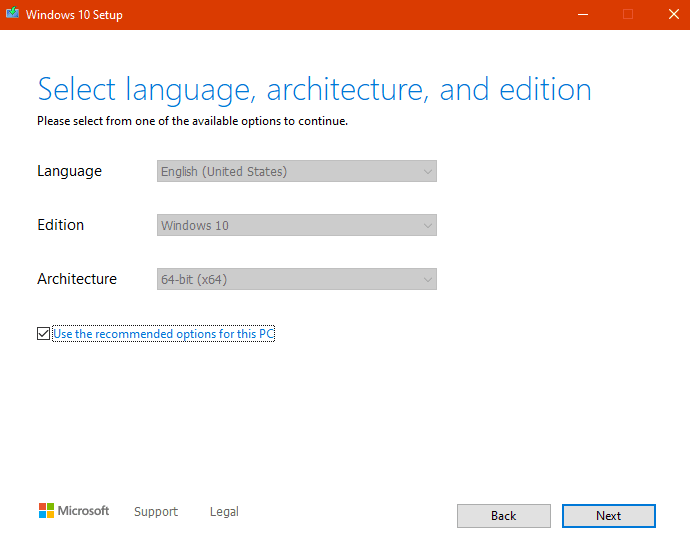
- Select your preferences:
- Language: Choose your preferred language
- Edition: Windows 10 (Home or Pro)
- Architecture: 64-bit (x64) – recommended for most modern computers
- Choose USB flash drive as your media type
- Select your USB drive from the list (remember, all data on it will be erased)
- Wait for the process to complete – This can take 30 minutes to an hour depending on your internet speed
Part 2: Installing Windows 10
Now that you have your bootable USB drive, let’s install Windows 10:
Step 1: Boot from USB
- Insert your USB drive into the computer where you want to install Windows 10
- Restart your computer and immediately start pressing the boot key
- Common boot keys: F12, F2, Delete, F10, or Esc
- Look for “Press F12 for Boot Menu” or similar message during startup
- Select your USB drive from the boot menu
- Press Enter to boot from the USB drive
Step 2: Windows Setup Process
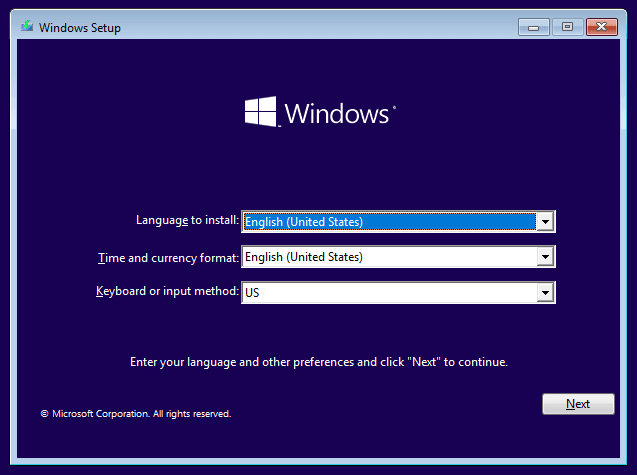
- Language and Region: Choose your language, time format, and keyboard layout, then click “Next”
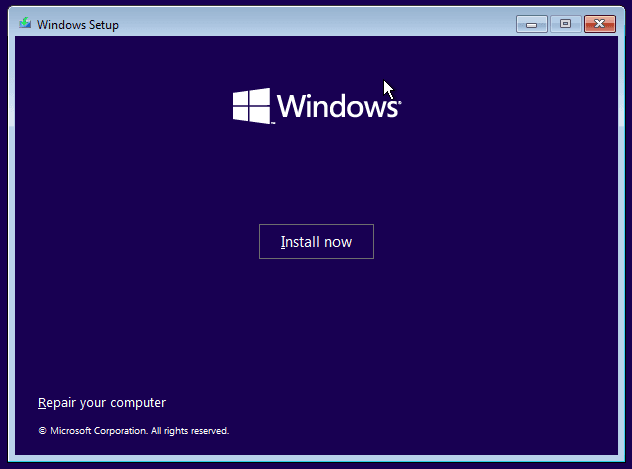
- Click “Install now” to begin the installation
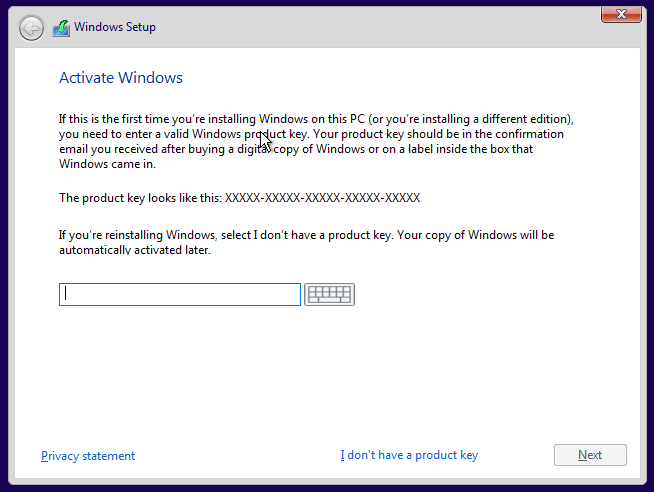
- Enter your product key if you have one, or click “I don’t have a product key” to activate later
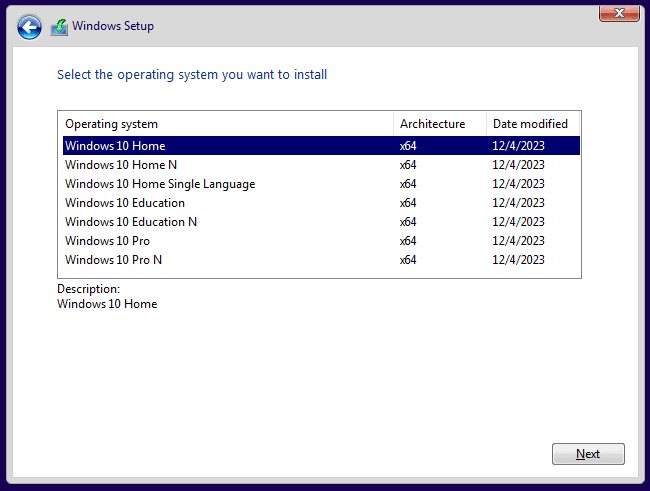
- Select Windows 10 edition (Home or Pro) based on your license
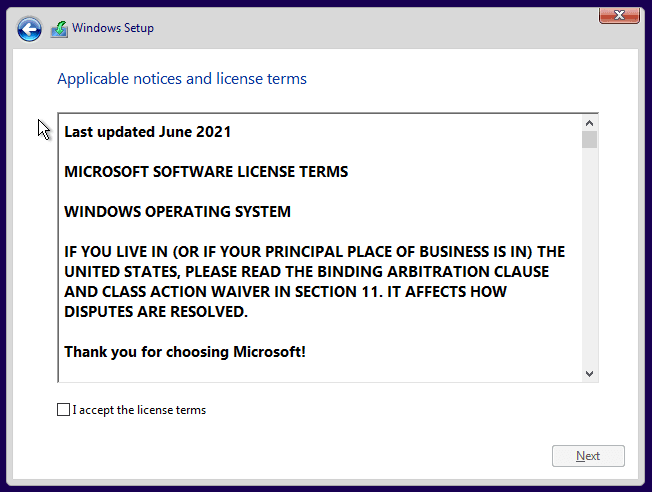
- Accept the license terms by checking the box and clicking “Next”
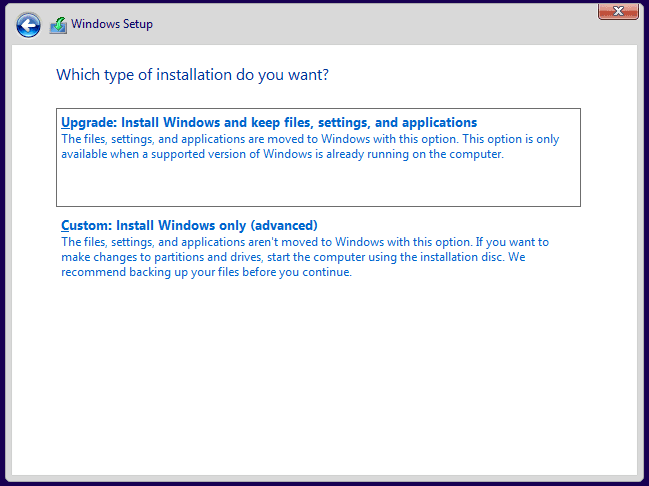
- Choose installation type: Select “Custom: Install Windows only (advanced)” for a clean installation
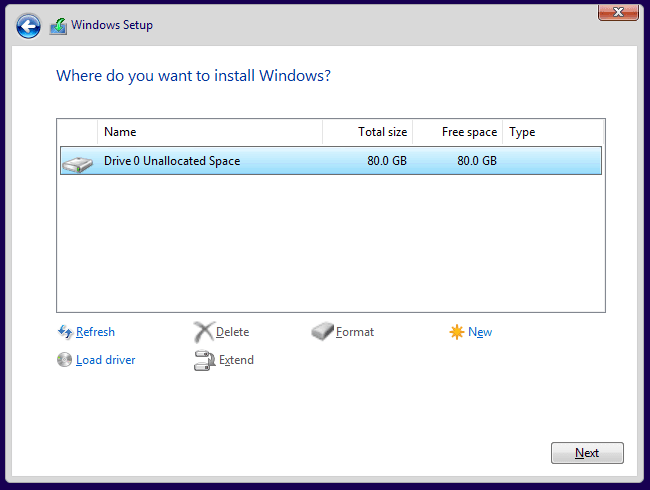
Step 3: Choose Installation Drive
- Select the drive where you want to install Windows 10
- Delete old partitions if you want a completely fresh start (Warning: This erases all data!)
- Click “Next” to begin installation
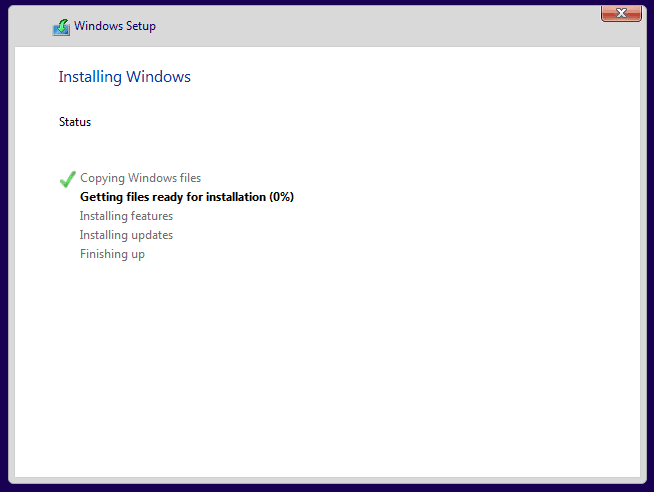
The installation process will now begin automatically. Your computer will restart several times – this is completely normal. The entire process typically takes 20-45 minutes.
Part 3: Initial Windows 10 Setup
After installation completes, Windows will guide you through the initial setup:
Basic Setup Steps
- Select your region and click “Yes”
- Choose keyboard layout and confirm
- Connect to Wi-Fi (if available) or skip for now
- Accept or customize privacy settings based on your preferences
Part 4: Setting Up User Accounts – Two Different Approaches
This is where you have important choices to make. Windows 10 offers two main types of user accounts, each with its own benefits.
Option A: Setting Up with a Microsoft Account (Online Account)
Best for users who want:
- Automatic syncing across devices
- Cloud storage integration (OneDrive)
- Access to Microsoft Store
- Automatic backup of settings
Steps for Microsoft Account Setup:
- When prompted “Let’s add your Microsoft account”, enter your existing Microsoft email and password
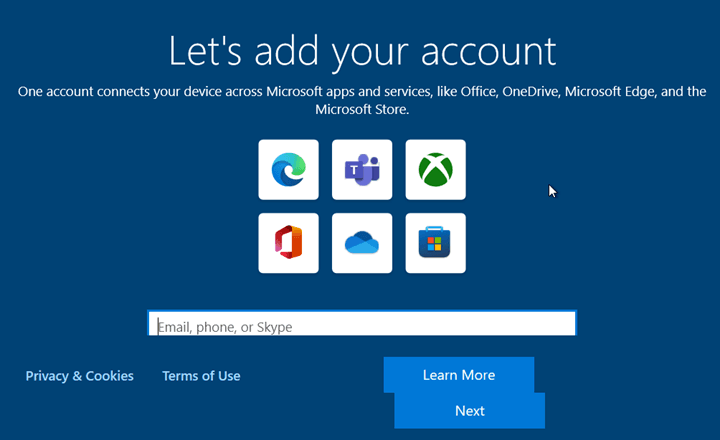
- Don’t have a Microsoft account? Click “Create account” and follow these steps:
- Enter your preferred email address or create a new @outlook.com address
- Create a strong password
- Add your phone number for security
- Complete the verification process
- Set up PIN – Windows will ask you to create a PIN for faster sign-in
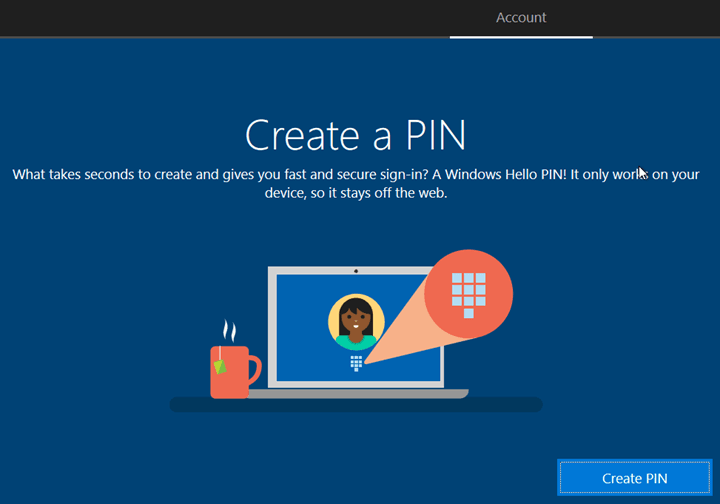
- Configure privacy settings – Review and adjust based on your comfort level
- Set up Windows Hello (if your device supports it) for biometric sign-in
Creating Additional Users with Microsoft Accounts:
- Press Windows key + I to open Settings
- Click “Accounts”
- Select “Family & other users” from the left menu
- Click “Add someone else to this PC”
- Enter the person’s Microsoft account email or click “I don’t have this person’s sign-in information”
- Follow prompts to either use an existing Microsoft account or create a new one
- Set account type – Click on the new user and select “Change account type” to choose between Standard User or Administrator
Option B: Setting Up with Local Accounts (Offline Accounts)
Best for users who want:
- Complete privacy and no data syncing
- No internet connection required
- Simple, traditional Windows experience
- Full control over their data
Steps for Local Account Setup:
Method 1: No Internet Connection
- Don’t connect to Wi-Fi during initial setup
- When prompted for Microsoft account, click “Skip for now” or “Offline account”
- Create local account:
- Enter your desired username
- Create a strong password
- Add password hint (optional but recommended)
- Complete privacy settings
Method 2: With Internet Connection (Bypass Microsoft Account)
- When at the Microsoft account sign-in screen, press Shift + F10 to open Command Prompt

- Type: start ms-cxh:localonly and press Enter
- Click “Continue with limited setup”
- Create your local account with username, password, and security questions
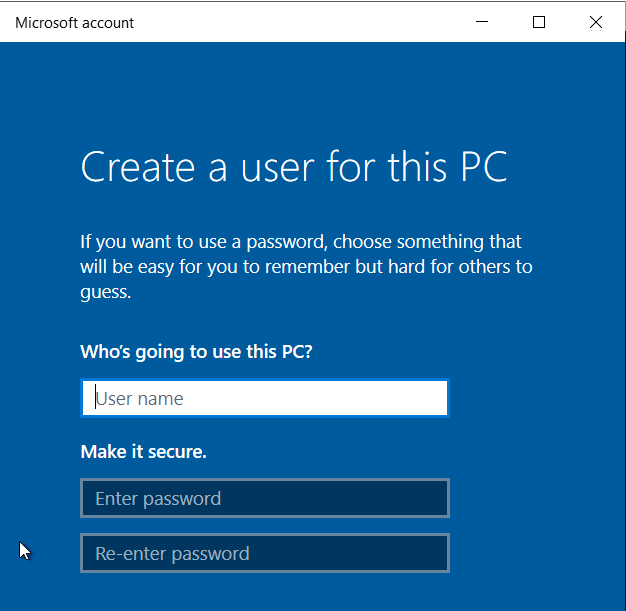
Creating Additional Local Users:
- Press Windows key + I to open Settings
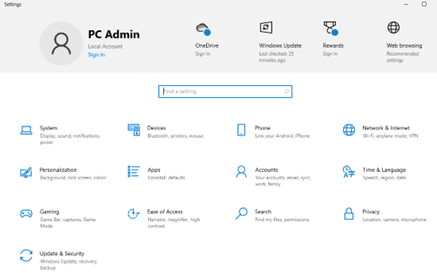
- Click “Accounts”
- Select “Family & other users”
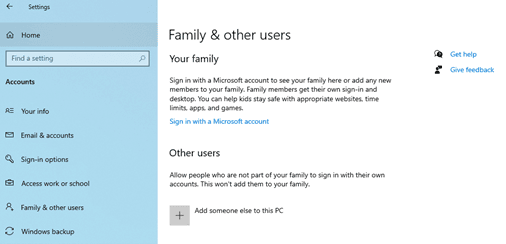
- Click “Add someone else to this PC”
- Click “I don’t have this person’s sign-in information”
- Click “Add a user without a Microsoft account”
- Set account type – Choose between Standard User or Administrator
- Enter username and password for the new local account
Part 5: Setting Up Proper Account Security
The Two-Account Security Strategy
For maximum security, we recommend setting up two accounts:
Administrator Account
- Use only for: Installing software, system changes, troubleshooting
- Should be: Protected with a strong password
- Don’t use for: Daily tasks, web browsing, email
Standard User Account
- Use for: Daily computing tasks, web browsing, office work
- Benefits: Limited system access prevents malware damage
- Setup: Create this as your primary account for everyday use
Steps to Implement Two-Account Strategy:
- Your first account (created during setup) automatically becomes an Administrator
- Create a second Standard User account following the steps above
- Change the account type of your daily-use account to “Standard User”
- Use the Standard account for all routine tasks
- Switch to Administrator only when Windows prompts for elevated permissions
Part 6: Essential Post-Installation Steps
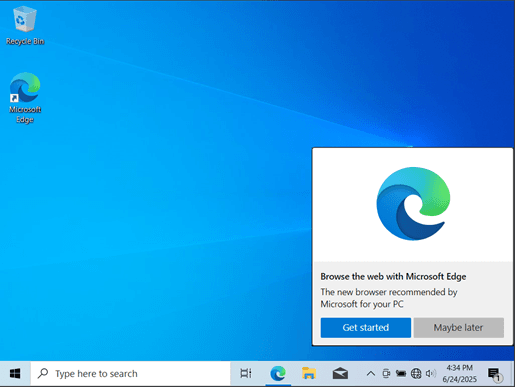
Immediate Tasks:
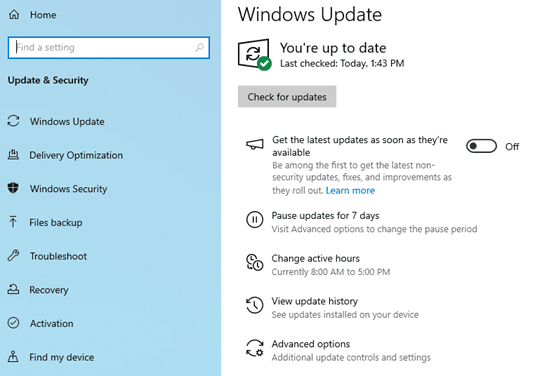
- Windows Updates: Go to Settings > Update & Security > Windows Update and install all available updates
- Install drivers: Windows usually finds most drivers automatically, but check Device Manager for any missing ones
- Install antivirus: While Windows Defender is built-in, consider additional security software
- Install essential software: Web browser, office suite, media players, etc.
Optimization Tips:
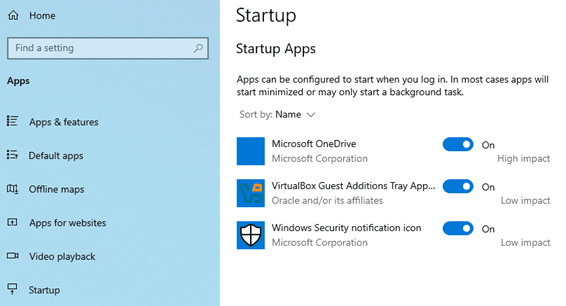
- Disable unnecessary startup programs: Task Manager > Startup tab
- Run Disk Cleanup: Search for “Disk Cleanup” in Start Menu
- Set up automatic backups: Use File History or backup to cloud storage
- Configure Windows Defender: Ensure real-time protection is enabled
Troubleshooting Common Issues
Boot Problems:
- USB not recognized: Try different USB ports or recreate the installation media
- Can’t access boot menu: Look up your specific computer model’s boot key
- Secure Boot issues: May need to disable in BIOS settings
Account Issues:
- Forgot Microsoft account password: Use password reset at account.microsoft.com
- Can’t create local account: Ensure you’re using the bypass method correctly
- Account permissions: Remember Administrator accounts can modify Standard User settings
Installation Issues:
- Installation freezes: Wait at least 30 minutes before restarting
- Driver problems: Download drivers from manufacturer’s website before installation
- Activation issues: Contact Microsoft support or use telephone activation
Final Thoughts
Installing Windows 10 and setting up user accounts correctly is one of the most important steps in securing your computer. Whether you choose Microsoft accounts for their convenience and cloud integration, or local accounts for privacy and simplicity, the key is understanding what each option offers.
Remember:
- Take your time – rushing through setup can lead to security issues later
- Choose strong passwords – this is your first line of defense
- Keep your system updated – regular updates are crucial for security
- Use Standard User accounts for daily tasks to minimize security risks
With this guide, you should be able to successfully install Windows 10 and set up your user accounts exactly how you want them. If you encounter any issues not covered here, don’t hesitate to seek help from a qualified PC technician – sometimes professional assistance can save you hours of troubleshooting.
Good luck with your Windows 10 installation!
