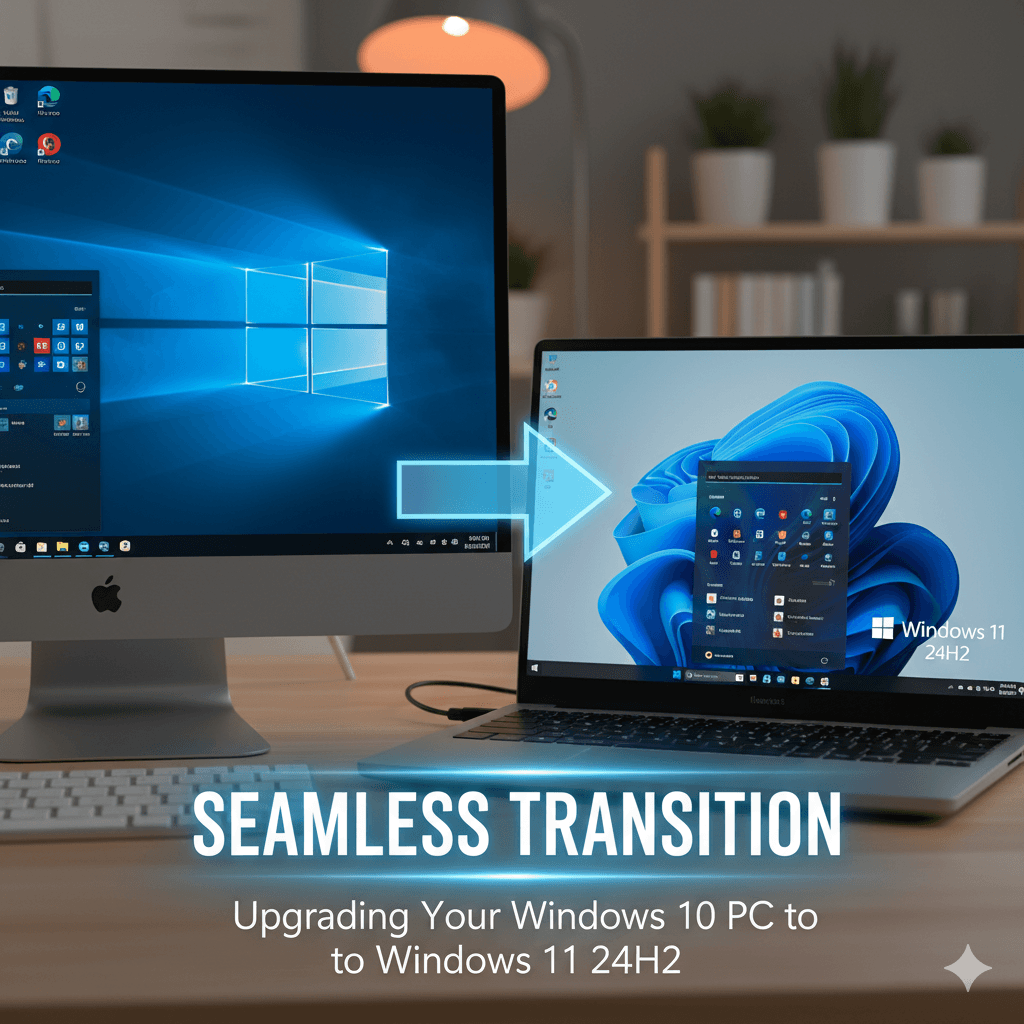
This comprehensive guide will walk you through the process of upgrading your existing Windows 10 PC to the latest Windows 11 24H2 build. Unlike a clean installation, an in-place upgrade aims to preserve your personal files, applications, and settings, offering a smoother transition to the new operating system. However, careful preparation is paramount to avoid potential issues.
Part I: Pre-Upgrade Essentials: Compatibility and Data Protection
1.1 Understanding the Upgrade Process: In-Place vs. Clean Install
Upgrading your Windows 10 system to Windows 11 23H2 involves an “in-place upgrade.” This method attempts to replace the core operating system files while retaining your existing user profiles, documents, installed applications, and many system settings. This contrasts with a “clean installation,” which completely wipes the drive and starts fresh, as detailed in our previous guide, How to Install Windows 11 24H2: Setup Checklist for First Time Users.
While convenient, an in-place upgrade carries a higher risk of inheriting existing software conflicts, driver incompatibilities, or system instability from the Windows 10 environment. Therefore, thorough preparation, especially compatibility checks and robust backups, is crucial for a successful and stable transition.
1.2 Critical Warning: Data Loss and Backup Imperatives
While an in-place upgrade aims to preserve your data, unforeseen errors, power failures, or software conflicts during the process can lead to irreversible data loss. It is imperative that all content on your personal computer is backed up securely prior to initiating the upgrade. This includes documents, photos, videos, music, and any other critical files.
Even if the upgrade completes successfully, you should have a backup in case you need to revert or if any applications become unstable.
1.3 Top 3 Methods for Secure Data Backup
A resilient data protection strategy often involves combining multiple backup methods to ensure redundancy and ease of recovery. The top three methods address different facets of data safety: individual files, full system state, and cloud accessibility.
1.3.1 Method 1: File-Based Cloud Synchronization
Cloud synchronization services are essential for backing up critical user files (such as Documents, Desktop, Pictures, and Videos). Microsoft’s integrated approach, known as Windows Backup, is deeply tied to OneDrive. Upon signing in with a Microsoft Account (MSA), the system automatically syncs these key folders to the cloud.

Utilizing Windows Backup not only stores files but also facilitates a smoother post-upgrade experience. By associating system settings, installed apps inventory, Wi-Fi credentials, and themes with the MSA, the system can automatically restore many configurations upon first login to the newly installed Windows 11. Microsoft provides 5GB of free OneDrive cloud storage, which is generally sufficient for common documents and settings, with options for expanding storage if required.
1.3.2 Method 2: External Drive File Backup (Manual or Windows Backup)
This traditional method involves copying essential files (Documents, Photos, Music, etc.) directly to an external USB hard drive. This keeps the files completely offline and readily accessible. Users can manually drag and drop files or utilize built-in Windows features such as File History for file versioning or the legacy Backup and Restore (Windows 7) feature, which is still available in Windows 11.
The primary advantage of this method is the high level of privacy and control; the data remains in the user’s physical possession. The primary limitation is that it does not back up applications, configurations, or the system state itself.
1.3.3 Method 3: Full Disk Imaging (The Ultimate Safety Net)
Creating a full disk image, also known as a bare-metal backup, involves making an exact, compressed copy of the entire hard drive, including the operating system, all programs, hidden partitions, and user files. While file backups ensure data survival, a full image serves as the ultimate safety net. If the upgrade fails or creates an unstable system, a full image allows the user to restore the entire system—including all installed applications and previous configurations—to the exact state it was in before the upgrade attempt.
This method is highly recommended as a comprehensive hedge against major upgrade failures. Popular, reliable software tools for creating disk images include Macrium Reflect and EaseUS ToDo Backup. It is important to note that disk imaging requires significantly more storage space and takes longer than simple file backups.
Part II: Windows 11 Compatibility Check
Before attempting any upgrade, it is crucial to ensure your PC meets the minimum system requirements for Windows 11. Unlike previous Windows versions, Windows 11 has stricter hardware demands.
2.1 Introducing the Microsoft PC Health Check App
The most straightforward way to verify compatibility is by using the official Microsoft PC Health Check App. This free tool scans your hardware and reports whether your PC meets the requirements for Windows 11.

Key Requirements Checked:
- Processor: 1 gigahertz (GHz) or faster with 2 or more cores on a compatible 64-bit processor or System on a Chip (SoC).
- RAM: 4 gigabytes (GB) or greater.
- Storage: 64 GB or greater available storage.
- System Firmware: UEFI, Secure Boot capable.
- TPM: Trusted Platform Module (TPM) version 2.0.
- Graphics Card: Compatible with DirectX 12 or later with WDDM 2.0 driver.
- Display: High definition (720p) display that is greater than 9” diagonally, 8 bits per color channel.
- Internet Connection and Microsoft Account: Required for Windows 11 Home edition.
2.2 Running the PC Health Check App
- Download: Download the PC Health Check App from the official Microsoft website.
- Install: Run the downloaded installer and follow the on-screen prompts.
- Check Now: Once installed, open the app and click the “Check now” button under the “Introducing Windows 11” section.
- Review Results: The app will quickly analyze your system and provide a clear “This PC meets Windows 11 requirements” or “This PC doesn’t currently meet Windows 11 requirements” message. If it doesn’t meet the requirements, it will often indicate which specific components are missing.

2.3 What if Your PC Doesn’t Meet Windows 11 Requirements?
If the PC Health Check App reports that your system is not compatible, you have a few options:
- Enable TPM/Secure Boot: For many users, the primary roadblocks are disabled TPM 2.0 or Secure Boot in the UEFI (BIOS) settings. These are often present on systems purchased in the last 5-7 years but are simply turned off. Consult your PC manufacturer’s documentation or support website for specific instructions on how to access your UEFI/BIOS settings (usually by pressing F2, Del, F10, or F12 repeatedly during startup) and enable these features. After enabling, re-run the PC Health Check App.
- Hardware Upgrade: If your PC has an older processor, insufficient RAM, or lacks TPM 2.0, a hardware upgrade may be necessary. This could involve adding more RAM, installing a compatible TPM module (if your motherboard supports it), or, in more severe cases, upgrading the motherboard and CPU. This can be a complex and costly endeavor.
- Continue with Windows 10 (ESU Program): For PCs that cannot upgrade to Windows 11, continuing to use Windows 10 is a viable option until its official end-of-life (EOL) date. Windows 10 will reach its end of support on October 14, 2025. After this date, it will no longer receive free security updates, non-security updates, or assisted support.
- Extended Security Update (ESU) Program for Home Users: Microsoft offers an Extended Security Update (ESU) program that provides continued security updates for up to three years after the EOL date. Historically, ESU programs were primarily for Enterprise and Education customers. However, Microsoft has recently announced that Windows 10 Home and Pro users will also be eligible for the ESU program for the first time. The ESU program is a paid subscription, with prices increasing each year for the three-year period. This allows users to continue receiving critical security patches, giving them more time to transition to a new, compatible PC. This is an important consideration for users with older hardware who cannot upgrade.
Part III: Preparing for the Upgrade
Once compatibility is confirmed and backups are secured, a few more preparatory steps can smooth the upgrade process.
3.1 Free Up Disk Space
The Windows 11 upgrade requires a significant amount of temporary disk space for the installation files and the creation of a rollback option. Ensure your primary drive (where Windows 10 is installed) has at least 25-30 GB of free space. You can free up space by:

- Running Disk Cleanup (search for “Disk Cleanup” in Windows Search).
- Uninstalling unnecessary applications via Settings > Apps > Apps & features.
- Moving large files to an external drive or cloud storage.
3.2 Update Windows 10 and Device Drivers
Before upgrading to Windows 11, ensure your current Windows 10 installation is fully up-to-date.
- Go to Settings > Update & Security > Windows Update.
- Click “Check for updates” and install all available updates. Restart your PC if prompted.
- Crucially, update your device drivers. Outdated drivers are a common cause of post-upgrade issues, especially with peripherals like printers, graphics cards, and network adapters. Visit your PC manufacturer’s support website (or individual component manufacturers like NVIDIA, AMD, Intel) to download the latest Windows 10 drivers. While Windows 11 will attempt to install compatible drivers, having the latest Windows 10 versions beforehand can prevent problems.
3.3 Disconnect Non-Essential Peripherals
To minimize conflicts during the upgrade, temporarily disconnect all non-essential peripheral devices, such as external hard drives, printers, USB hubs, webcams, and game controllers. Only keep essential devices like your keyboard, mouse, and monitor connected.
3.4 Temporarily Disable Third-Party Antivirus Software
Third-party antivirus and security suites can sometimes interfere with the Windows upgrade process. If you use one, temporarily disable it before starting the upgrade. Remember to re-enable it once Windows 11 is fully installed and stable. Windows Defender will provide baseline protection during this period.
Part IV: Initiating the Windows 11 23H2 Upgrade
There are generally two primary methods to initiate the in-place upgrade: via Windows Update or by using the Windows 11 Installation Assistant.
4.1 Method 1: Upgrading via Windows Update (Recommended)
This is the simplest and most recommended method, as it automatically delivers the upgrade when your PC is ready and compatible.

- Check Windows Update: Go to Settings > Update & Security > Windows Update.
- Look for Offer: If your PC meets the requirements, you should see a banner indicating that “This PC meets the Windows 11 requirements” and an offer to download and install Windows 11 23H2.
- Download and Install: Click “Download and install.” Windows will then download the necessary files (which can take a while) and begin the installation process. Your PC will restart multiple times.
4.2 Method 2: Using the Windows 11 Installation Assistant
If the offer doesn’t appear in Windows Update, or you prefer to initiate it manually, the Installation Assistant is the next best option.

- Download: Go to the official Microsoft Software Download page for Windows 11.
- Download Assistant: Under the “Windows 11 Installation Assistant” section, click “Download Now.”
- Run Assistant: Run the downloaded Windows11InstallationAssistant.exe file.
- Accept and Install: Accept the license terms, and the assistant will guide you through the download and installation process. It will verify compatibility again, download the files, and prepare your PC for the upgrade. Your PC will restart multiple times during this process.
Part V: Post-Upgrade Experience: What to Expect and How to Adjust
Once the upgrade is complete, your PC will boot into Windows 11. While your files and applications should be intact, the operating system’s look and feel will be significantly different.
5.1 First Impressions: Key Changes in Windows 11
- New Start Menu: The most noticeable change. The Start Menu is now centered on the taskbar and features a simplified layout with “Pinned” apps at the top, followed by “Recommended” items (recently opened files/apps). There is no longer the live tiles feature from Windows 10.

- Redesigned Taskbar: Also centered, with new icons and a more minimalist look. The search icon, Task View, and Widgets are new additions.
- Refreshed Settings App: The Settings app has been completely overhauled with a new navigation pane on the left and a more intuitive, categorized layout.

- Snap Layouts and Groups: Enhanced window management tools that allow you to quickly arrange multiple windows into predefined layouts.
- Widgets Panel: A new panel (accessed by the Widgets icon on the taskbar) providing quick glances at news, weather, calendar, and more.
- File Explorer: A refreshed, modern look with new icons and a simplified ribbon.
- Microsoft Store: A completely redesigned Microsoft Store app with a broader selection of apps.
5.2 App Compatibility and Removed Features
While most common Windows 10 applications will function on Windows 11, some older or specialized software might encounter issues or be removed entirely.
- Unsupported Applications: Some legacy applications, especially 32-bit software with deep system integrations, may not work or may be automatically uninstalled during the upgrade. If a critical application is no longer functioning, check the developer’s website for a Windows 11-compatible version or alternative solutions.
- Removed Windows Features:
- Live Tiles: No longer present in the Start Menu.
- Cortana: Still exists but is less prominent and no longer integrated into the initial boot experience.
- Internet Explorer: Replaced by Microsoft Edge with IE Mode.
- Skype: Replaced by Microsoft Teams as the default communication app.
- Tablet Mode: The dedicated tablet mode is removed; Windows 11 automatically adjusts when using a tablet device.
5.3 Printer Drivers: The Number One Culprit
Printers are notoriously the most common peripheral to experience issues after a major operating system upgrade.
- Driver Incompatibility: If your printer’s drivers were not updated to the latest Windows 10 version prior to the upgrade, or if your printer manufacturer has not released specific Windows 11 drivers, your printer may stop working entirely.
- Troubleshooting Steps:
- Check Manufacturer Website: The first step is always to visit your printer manufacturer’s official support website. Search for your specific printer model and look for “Drivers” or “Support” for Windows 11 (or the latest Windows 10 drivers if no 11 drivers are available). Download and install these.
- Windows Update: Go to Settings > Windows Update > Advanced options > Optional updates and check for any printer-related driver updates.
- Reinstall Printer: If problems persist, completely uninstall the printer from Settings > Bluetooth & devices > Printers & scanners, restart your PC, and then try to reinstall it using the latest drivers.
- Potential Purchase: In unfortunate cases, very old printers may simply not receive Windows 11 driver support, prompting the need to purchase a new, compatible printer. This is a crucial warning for users with older printer models.
Part VI: Post-Upgrade Optimization and Configuration
After the initial boot into Windows 11, it’s essential to perform several optimization and configuration steps to ensure stability, performance, and a more comfortable user experience, especially coming from Windows 10.
6.1 Initial Updates: Windows and Microsoft Store
Even after an upgrade, further updates are always available shortly after installation. This is the foundation of a stable operating system.
- Step 1: Windows Update. Immediately navigate to Settings > Windows Update. Run “Check for updates” and install all critical and security updates offered. This process should be repeated until no more critical updates are found.
- Step 2: Optional Updates. It is essential to check the Optional updates section found under Advanced options. These updates often contain non-critical drivers or minor feature improvements that can address specific hardware quirks or enhance overall system performance following an upgrade.
- Step 3: Microsoft Store Updates. Many core Windows components, such as the Calculator, Photos, and Snipping Tool apps, are updated through the Microsoft Store, not Windows Update. Open the Microsoft Store application, access the Library, and check for and install all pending application updates.
6.2 Updating All Remaining Device Drivers
While you updated drivers before the upgrade, it’s vital to do a full sweep after. Windows 11 might have installed generic drivers, which are functional but not optimized.
- Visit your PC or motherboard manufacturer’s support page for your exact model. Download and install all available Windows 11 drivers for your chipset, graphics card, audio, network adapters, and any other specific components.
- Intel RST/VMD Drivers: For newer Intel systems, installing the latest Intel Rapid Storage Technology (IRST) or Volume Management Device (VMD) drivers is crucial for optimal SSD performance and stability.
6.3 Minimizing Microsoft Data Tracking (Telemetry and Privacy)
Windows 11 collects diagnostic data to improve security and optimize services. Users prioritizing privacy can significantly reduce the amount of information shared with Microsoft by adjusting system settings.
- Diagnostic Data: Go to Settings > Privacy & security > Diagnostics & feedback. Toggle off “Send optional diagnostic data” and “Tailored experiences.”
- Delete History: Click Delete under “Delete diagnostic data.”
- Other Privacy Settings: Review other privacy settings under Settings > Privacy & security like “Online speech recognition” and “Activity history” and disable features as desired.
6.4 Optimizing an Upgraded System for Performance
An upgraded system can sometimes feel less “snappy” than a clean install due to accumulated software or settings.
- Disable Startup Apps: Use Task Manager (CTRL + SHIFT + ESC) to examine the “Startup apps” tab. Disable any non-essential applications that automatically launch upon system boot, as these are a common source of slow boot times and resource drain. This is particularly important after an upgrade, as many Windows 10 apps might now be starting needlessly.
- Check for Leftover Software: Review your installed applications (Settings > Apps > Installed apps) and uninstall any programs that are no longer needed, especially legacy software that might be causing conflicts.
- Run System File Checker (SFC): Open Command Prompt as administrator and type sfc /scannow. This tool checks for and repairs corrupted Windows system files, which can sometimes occur during an upgrade.
- Power Settings: Review power settings (often under Settings > System > Power & battery) to ensure they align with usage. On high-performance systems, verifying that the device uses a performance-oriented power plan can prevent thermal throttling or unnecessary sleep modes.
6.5 Configuring the Desktop to Resemble Windows 10
Many users find the Windows 11 interface, particularly the centered taskbar and new Start Menu, jarring. You can customize several elements to make it feel more familiar.
- Move Taskbar to Left:
- Right-click on an empty area of the taskbar and select “Taskbar settings.”
- Expand “Taskbar behaviors.”
- Change “Taskbar alignment” from “Center” to “Left.”
- Familiar Start Menu Access: While you can’t bring back Windows 10’s Live Tiles, moving the Start button to the left offers a familiar starting point.
- Hide Taskbar Icons: In “Taskbar settings,” you can toggle off unwanted icons like Search, Task View, and Widgets to declutter the taskbar.
- Pin Frequent Apps: Drag and drop your most used applications to the taskbar or Start Menu’s “Pinned” section for quick access.
- File Explorer “This PC” View: Open File Explorer, click the ellipsis (…) in the command bar, select “Options,” and under the “General” tab, change “Open File Explorer to” to “This PC.”
Part VII: Troubleshooting Common Post-Upgrade Issues
7.1 Performance Degradation or Sluggishness
- Cause: Often due to conflicting drivers, excessive startup programs, or accumulated Windows 10 cruft.
- Solution: Follow the optimization steps in Section 6.4 (Disable Startup Apps, Check Leftover Software, SFC Scan). Ensure all drivers are Windows 11 compatible and updated. Consider a fresh start by backing up data and performing a clean install if performance remains poor.
7.2 Application Crashes or Instability
- Cause: App incompatibility with Windows 11 or corrupted app files.
- Solution:
- Reinstall App: Uninstall the problematic application and reinstall the latest version, preferably a Windows 11-specific version if available.
- Compatibility Mode: Right-click the application’s executable file, select Properties > Compatibility tab, and try running it in compatibility mode for Windows 10.
- Check Developer Support: Consult the application developer’s website for Windows 11 compatibility notes or updates.
7.3 Peripheral (e.g., Printer, Scanner) Not Working
- Cause: Incompatible or missing drivers.
- Solution: Refer to the detailed troubleshooting steps for printers in Section 5.3. Always prioritize official Windows 11 drivers from the manufacturer.
7.4 System Rollback: Going Back to Windows 10
Windows 11 provides a built-in option to revert to Windows 10 within 10 days of the upgrade. This is a critical safety net.
- How to Rollback: Go to Settings > System > Recovery. Under “Recovery options,” you should see “Go back.” Click Go back and follow the prompts.
- Limitations: This option is only available for 10 days. After this period, if you wish to return to Windows 10, you would need to perform a clean installation of Windows 10, which would erase all your data unless you have a full disk image backup (as discussed in Section 1.3.3).
Part VIII: Conclusion
Upgrading from Windows 10 to Windows 11 23H2 can provide a modern, secure, and aesthetically pleasing operating system experience. By diligently performing the compatibility checks, ensuring robust data backups, and following the outlined upgrade and post-upgrade optimization steps, users can achieve a smooth transition and enjoy the benefits of Windows 11. Be prepared for some interface adjustments and the potential need for driver updates, especially for printers, but with careful preparation, a successful upgrade is well within reach.
