This expert report provides a detailed, step-by-step methodology for performing a clean installation of the current Microsoft Windows 11 24H2 build. This process ensures optimal system performance and stability by completely replacing the existing operating system environment.
Part I: Pre-Installation: Ensuring Safety and Readiness
1.1 Introduction: Why Perform a Clean Install of Windows 11 24H2?
A clean installation is widely regarded as the superior method for deploying a new operating system, particularly after a major feature release such as Windows 11 24H2. While an in-place upgrade from an older operating system like Windows 10 is possible, a clean installation is the only way to maximize system performance and stability because it eliminates residual files, software conflicts, and configuration clutter accumulated over time.
By starting fresh, the system benefits from an uncompromised installation that adheres strictly to the new operating system’s requirements, resulting in the desired “snappy” feel often lost in complex upgrade scenarios. The objective of this guide is to ensure this process, though comprehensive, is accessible and safe for users performing it for the first time.
1.2 Critical Warning: Data Loss and Backup Imperatives
The most critical element of a clean installation is the irreversible loss of data. When performing a clean installation, the process requires the complete erasure and reformatting of the primary hard drive or solid-state drive (SSD) where Windows resides. This action permanently deletes all personal documents, photos, installed programs, and customized settings. It is imperative that all content on the personal computer is backed up securely prior to initiating the installation.
Although newer versions of Windows offer a “Reset this PC” feature that can sometimes preserve user files during a system refresh, this guide focuses on the “wipe and reload” method, which guarantees maximum system hygiene but necessitates a full external backup. Any user who proceeds without verifying a successful backup WILL LOSE ALL THEIR DATA.
1.3 Top 3 Methods for Secure Data Backup
A resilient data protection strategy often involves combining multiple backup methods to ensure redundancy and ease of recovery. The top three methods address different facets of data safety: individual files, full system state, and cloud accessibility.
1.3.1 Method 1: File-Based Cloud Synchronization
Cloud synchronization services are essential for backing up critical user files (such as Documents, Desktop, Pictures, and Videos). Microsoft’s integrated approach, known as Windows Backup, is deeply tied to OneDrive. Upon signing in with a Microsoft Account (MSA), the system automatically syncs these key folders to the cloud.
Beyond file storage, utilizing Windows Backup facilitates a faster post-installation experience. By associating system settings, installed apps inventory, Wi-Fi credentials, and themes with the MSA, the system can automatically restore many configurations upon first login to the newly installed Windows 11. This integration makes the process significantly smoother, establishing a direct link between the security choice (using an MSA) and recovery convenience. Microsoft provides 5GB of free OneDrive cloud storage, which is generally sufficient for common documents and settings, with options for expanding storage if required.
1.3.2 Method 2: External Drive File Backup (Manual or Windows Backup)
This traditional method involves copying essential files (Documents, Photos, Music, etc.) directly to an external USB hard drive. This keeps the files completely offline and readily accessible. Users can manually drag and drop files or utilize built-in Windows features such as File History for file versioning or the legacy Backup and Restore (Windows 7) feature, which is still available in Windows 11.
The primary advantage of this method is the high level of privacy and control; the data remains in the user’s physical possession. The primary limitation is that it does not back up applications, configurations, or the system state itself.
1.3.3 Method 3: Full Disk Imaging (The Safety Net)
Creating a full disk image, also known as a bare-metal backup, involves making an exact, compressed copy of the entire hard drive, including the operating system, all programs, hidden partitions, and user files. While file backups ensure data survival, a full image serves as the ultimate safety net. If the clean installation fails, or if new hardware conflicts arise (such as the temporary issue noted with 24H2 and Intel audio drivers), a full image allows the user to restore the entire system—including all installed applications and previous configurations—to the exact state it was in before the wipe.
This method is highly recommended as a comprehensive hedge against major installation failures, as re-installing all software can be highly labor-intensive and time-consuming. Popular, reliable software tools for creating disk images include Macrium Reflect and EaseUS ToDo Backup. It is important to note that disk imaging requires significantly more storage space and takes longer than simple file backups.
A summary comparison of these essential solutions is provided below.
Table: Comparing Essential Data Backup Solutions
| Backup Method | Data Type Protected | Primary Benefit | Key Trade-off | Recommended Tool |
| Full Disk Imaging | OS, Settings, Applications, Files (Everything) | Complete system restoration (Bare-metal recovery) | Large storage requirement, slower initial backup | Macrium Reflect, EaseUS Todo Backup |
| Cloud Synchronization | Files, basic Settings, Passwords, App Inventory | Remote access, automatic, fast recovery of files | Limited free storage (e.g., 5GB free OneDrive), requires MSA | Microsoft OneDrive (Windows Backup) |
| Local File Copy | Selected User Files (Documents, Pictures) | Simple, offline access, high privacy | Does not back up applications or system state | File History, Manual Copy |
Part II: Creating the Windows 11 24H2 Installation Media
2.1 Locating the Official Microsoft Download Page
The preparation for the clean installation begins by obtaining the official installation files directly from Microsoft. The necessary tool, the Media Creation Tool (MCT), is found on the Microsoft Software Download website. It is crucial to use the official tool to ensure the integrity and authenticity of the Windows 11 24H2 build.
2.2 Step-by-Step Guide to Using the Media Creation Tool (MCT)
The MCT simplifies the complex process of downloading the operating system files, formatting the storage, and creating the necessary boot sectors to make a USB drive functional as installation media.
- Step 1: Download and Prepare. The user must download and execute the MediaCreationTool.exe file. A blank USB flash drive with a minimum capacity of 8GB must be available and connected to the PC where the tool is being run. The user must be running the tool with administrator privileges.
- Step 2: Run the Tool. Once executed, the user will be prompted to read and accept the Microsoft software license terms before proceeding.
- Step 3: Select Options. The next screen, labeled “What do you want to do?”, requires the user to select the option “Create installation media for another PC”.
- Step 4: Language and Edition. The tool will typically suggest options based on the host PC. It is advisable to uncheck the “Use the recommended options for this PC” box to manually confirm the desired language and the 64-bit architecture, which is mandatory for Windows 11.
- Step 5: Select Media. The user must choose USB flash drive and then confirm the correct drive letter corresponding to the prepared USB drive. A crucial warning is displayed that any content currently residing on the flash drive will be deleted during the formatting and creation process.
- Step 6: Completion. The MCT proceeds to download the necessary Windows 11 24H2 files, format the selected USB device, and transfer the installation media. This phase can be time-consuming, depending primarily on the speed of the user’s internet connection. Once finished, the USB drive is ready to serve as bootable Windows 11 Installation Media.
2.3 Proactive Driver Check for 24H2
Before proceeding with the installation, potential hardware conflicts should be addressed. Microsoft has acknowledged that certain devices may encounter issues specifically when updating to version 24H2, particularly those with Intel® SST Audio Controller drivers. If the existing drivers are outdated or incompatible, the system may exhibit instability even after a clean installation.
This indicates that relying solely on the drivers provided during the initial Windows installation may not be sufficient for optimal performance or stability. Therefore, for modern Intel machines or specific laptops, it is highly recommended that the user proactively visit the PC manufacturer’s support website, locate the latest chipset and storage drivers, and save them to a separate folder on the root of the installation USB drive. These drivers can be manually installed later during the setup or immediately after the first desktop boot, preventing common performance bottlenecks and hardware detection failures.
Part III: Initiating the Installation and Accessing the Boot Menu
3.1 Understanding the Boot Process (UEFI and Secure Boot)
Modern PCs running Windows 11 utilize the Unified Extensible Firmware Interface (UEFI) instead of the legacy BIOS. UEFI enables essential security features like Secure Boot and is necessary for compatibility with modern drive standards (GPT), ensuring fast and secure system startup. To proceed with the clean install, the user must ensure the system boots directly from the USB media, overriding the primary hard drive.
3.2 How to Access the Boot Menu on Startup (The F-Key Challenge)
To force the system to boot from the installation USB drive, the user must access the temporary Boot Menu. This is achieved by pressing a specific Function key (F-key) immediately as the PC starts up. Since UEFI systems boot extremely fast, the critical technique is to plug in the USB drive, restart the PC, and then begin pressing the designated boot menu key repeatedly the moment the power button is pushed. Waiting until the manufacturer logo appears can often be too late.
The required key varies by manufacturer and specific model (often Esc, F2, F10, F12, or Delete). Once the correct key is pressed, the system displays the Boot Menu, where the user can select the USB device (often listed as “UEFI USB Device” or the specific name of the flash drive) to initiate the Windows Setup process.
Table: Common Boot Menu Access Keys by Manufacturer
| Manufacturer | Most Common Boot Menu Key | Alternative/BIOS Key |
| Dell | F12 | F2 |
| HP | F9 or Esc | F10 or F1 |
| ASUS | F8 or F11 | F2 or Del |
| Lenovo | F12 | F2 or Fn + F2 |
| MSI | F11 | Del |
| Gateway | F11 or Esc | F2, Del |
Part IV: Step-by-Step Clean Installation of Windows 11 24H2
4.1 Starting Windows Setup and Initial Configuration
Once the PC successfully boots from the USB drive, the Windows Setup screen appears.
- Step 1: Language and Input. Select the appropriate language, time format, and keyboard input method, then click Next.
- Step 2: Install Now. Click the “Install now” button to start the main installation routine.
- Step 3: License Key. The system will ask for a product key. If the user is reinstalling Windows 11 on a device that was previously activated using a digital license linked to their Microsoft Account, they must select “I don’t have a product key.” The operating system will automatically detect the digital license and activate itself later once an internet connection is established.
- Step 4: Edition Selection. If the product key step was skipped, the user must select the exact Windows 11 edition (Home, Pro, Enterprise, etc.) corresponding to their existing license.
- Step 5: Accept Terms. Accept the Microsoft Software License Terms to continue the setup.
4.2 Choosing the Installation Type: Custom (Advanced)
The installation type selection is the decisive point between an upgrade and a clean installation. The user must select the option “Custom: Install Windows only (advanced).” This choice confirms the intent to discard the existing operating system and install a fresh copy of Windows 11, ensuring optimal performance.
4.3 Critical Step: Drive Partitioning and Formatting
This step carries the highest risk of data loss and requires deliberate action. The screen will list all installed storage devices (Disk 0, Disk 1, etc.) and their current partitions (System, Recovery, Primary).
- Step 1: Identifying the Target Drive. If the computer contains multiple physical drives (e.g., an SSD for Windows and an HDD for storage), the user must correctly identify the drive intended for the new Windows installation, usually based on the drive size.
- Step 2: Wiping the Old Operating System Partitions. To achieve the cleanest possible installation, it is necessary to eliminate all traces of the previous operating system and its support structures. The user must select every partition associated with the old OS on the target disk (e.g., System, Recovery, and the large Primary partition) and click Delete for each one. Deleting all these partitions turns the disk space into a single block labeled “Unallocated Space”.
- Step 3: Installing. Select the resulting Unallocated Space and click Next. The Windows installer is designed to automatically create and format the necessary partitions (including the System, MSR, and Primary Windows partitions) using the modern GPT standard required for UEFI booting, and then commence file copying.
- Warning: Partition Table Error. If, upon selecting the drive, the user receives an error stating that the disk uses an MBR partition table and requires a GPT partition table for EFI systems, the user must follow the advanced troubleshooting steps detailed in Part VIII using the DiskPart utility.
4.4 Beginning the File Copy Process
Once the target drive is selected, Windows begins copying and installing the necessary files. The installation includes several phases: copying files, getting files ready for installation, installing features, installing updates, and finishing up. The PC will restart multiple times during this phase, and the user must not turn off the PC.
If the setup appears to halt for an extended period (e.g., stuck on 0% or 10% on the “Getting files ready” screen), it may not be a true failure but a temporary bottleneck. Potential resolutions include patiently waiting or disconnecting all non-essential peripheral devices, as conflicts in hardware can sometimes stall the file preparation process.
Part V: The Out-of-Box Experience (OOBE) and Account Setup
After the installation is complete and the PC reboots for the final time, the Out-of-Box Experience (OOBE) begins, focusing on regional settings and, most crucially, user account creation.
5.1 The Choice: Microsoft Account (MSA) vs. Local Account
The OOBE strongly encourages the user to sign in or create a Microsoft Account (MSA). The fundamental decision at this stage revolves around prioritizing cloud convenience versus local privacy and control.
5.2 Pros and Cons of Each Account Type
| Feature | Microsoft Account (MSA) | Local Account |
| Cloud Integration & Sync | High: Syncs settings, Wi-Fi passwords, and files via OneDrive | Minimal: Configurations and files remain strictly local |
| Privacy & Data Sharing | Lower: Increased data sharing, tied to telemetry and personalized experiences | Higher: Reduced data sharing and independence from Microsoft’s ecosystem |
| Password Reset/Recovery | Excellent: Resettable via email/phone using Microsoft’s centralized identity system | Complex: Dependent solely on local security questions or external backups if forgotten |
| Microsoft Services | Required for full functionality of the Microsoft Store, Xbox, and Office 365/Copilot services | Full Windows functionality, but limited access to cloud-based Microsoft applications |
| Primary Driver | Convenience and seamless device transition | Privacy, control, and reduced cloud dependence |
5.3 Advanced Method: Bypassing the Mandatory Microsoft Account
Modern versions of Windows 11, particularly Home edition, often require an internet connection during setup, forcing the user toward MSA creation. For users who prefer a Local Account to maximize privacy, a reliable workaround exists during the OOBE stage. This technique effectively bypasses the Network Requirement Optimization (NRO) phase.
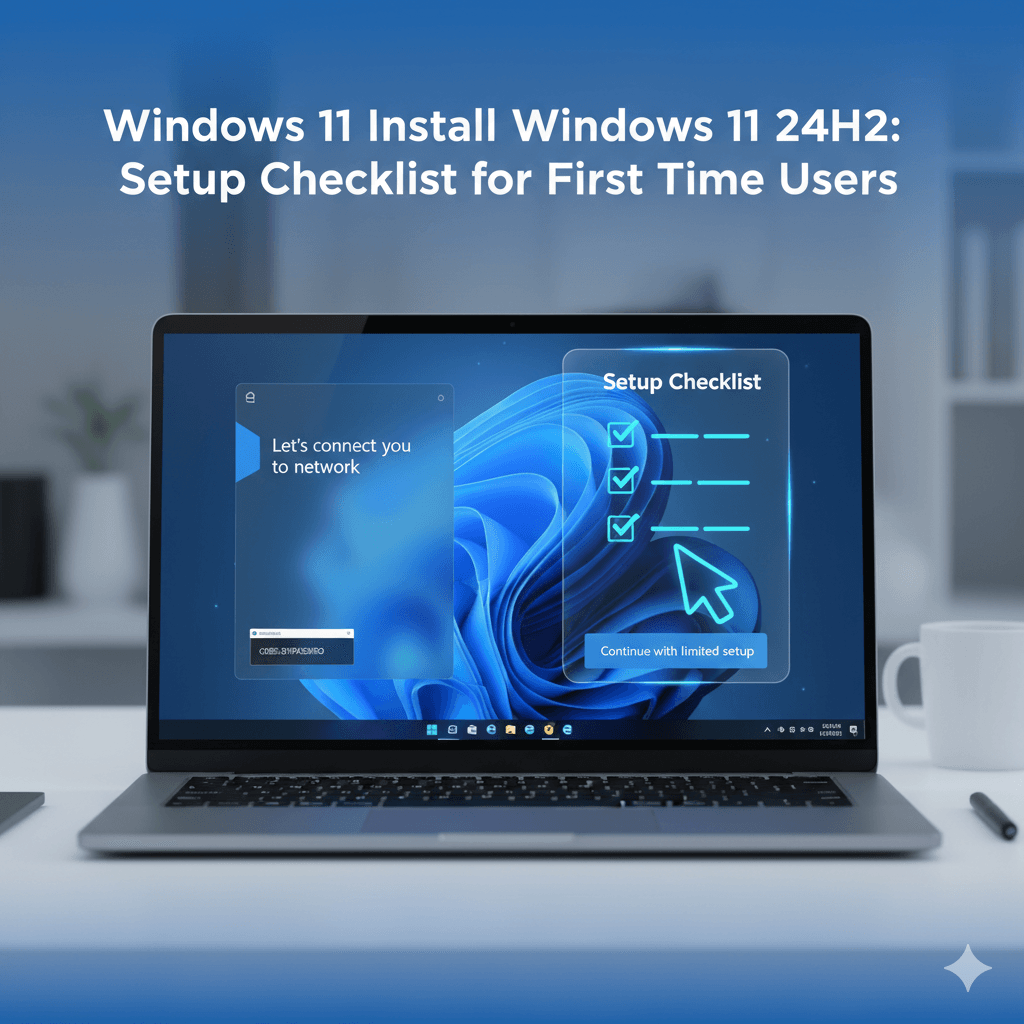
Option 1: The Network Bypass Method (OOBE\BYPASSNRO)
- Step 1: Access Command Prompt. When the setup reaches the “Let’s connect you to a network” screen, press Shift + F10 simultaneously to open the Command Prompt window.
- Step 2: Run Bypass Command. In the Command Prompt, type the following command exactly as written and press Enter: OOBE\BYPASSNRO.
- Step 3: System Reboot. The command executes and forces an immediate system reboot.
- Step 4: Select Limited Setup. Upon restarting and returning to the network setup screen, the user will now see the option “I don’t have internet.” Select this option.
- Step 5: Create Local Account. Select “Continue with limited setup.” This enables the user to enter a desired local username and set up a password (or leave it blank), creating a local account completely detached from the Microsoft Cloud environment.
Option 2: The Direct Local Account Command (start ms-cxh:localonly)
As the network bypass command may be removed in future updates, this alternative offers a more direct route:
- Step 1: Access Command Prompt. When the setup reaches the “Let’s connect you to a network” screen, press Shift + F10 simultaneously to open the Command Prompt window.
- Step 2: Run Direct Command. In the Command Prompt, type the following command exactly as written and press Enter:
start ms-cxh:localonly. - Step 3: Create Local Account. After executing this command and closing the command window, the OOBE should immediately skip the network requirement and proceed to the user account creation screen, allowing for the creation of an offline Local Account.
5.4 Completing the Initial Setup
After account creation, the system will ask several final questions regarding basic privacy permissions (such as location services, diagnostics, and advertising ID). These settings should be reviewed, and users focused on minimizing tracking should opt to disable non-essential data sharing. The setup will finalize, and the user will then boot into the Windows 11 desktop for the first time.
Part VI: Post-Installation Optimization and Security
The system is operational after the clean install, but several steps must be taken immediately to ensure stability, proper driver function, and privacy optimization.
6.1 Initial Updates: Windows, Microsoft Store, and Optional Fixes
Even with the latest 24H2 media, more updates are always available shortly after installation. This is the foundation of a stable operating system.
- Step 1: Windows Update. Immediately navigate to Settings > Windows Update. Run “Check for updates” and install all critical and security updates offered. This process should be repeated until no more critical updates are found.
- Step 2: Optional Updates. It is essential to check the Optional updates section found under Advanced options. These updates often contain non-critical drivers or minor feature improvements that can address specific hardware quirks or enhance overall system performance following a clean installation.
- Step 3: Microsoft Store Updates. Many core Windows components, such as the Calculator, Photos, and Snipping Tool apps, are updated through the Microsoft Store, not Windows Update. Open the Microsoft Store application, access the Library, and check for and install all pending application updates.
6.2 Installing Essential Device Drivers
While Windows 11 installs basic, generic drivers that allow hardware to function, these drivers often lack the performance optimizations, power management controls, and advanced feature sets required for high performance and system stability. The full potential of the device is realized only after installing drivers specifically designed and optimized by the Original Equipment Manufacturer (OEM).
The system must be properly identified by noting the baseboard manufacturer and product model (available via System Information). The user must then visit the PC or motherboard manufacturer’s Support or Downloads webpage for that exact model.
Prioritized Driver Installation Order: Drivers should generally be installed in the following sequence, with a system restart often required after major components:
- BIOS/UEFI Firmware Update (if required and handled with caution).
- Chipset Drivers (Critical for managing data flow between the CPU, RAM, and peripherals).
- Storage/RAID/NVMe Drivers (Ensuring the high-speed SSD functions optimally).
- Graphics Drivers (NVIDIA, AMD, or Intel).
- Sound and Network Drivers.
6.3 Minimizing Microsoft Data Tracking (Telemetry and Privacy)
Windows 11 collects diagnostic data to improve security and optimize services. Users prioritizing privacy can significantly reduce the amount of information shared with Microsoft by adjusting system settings.
- Step 1: Diagnostic Data. Go to Settings > Privacy & security > Diagnostics & feedback. Toggle off the setting for “Send optional diagnostic data.” This action limits the information shared to the minimum required diagnostic data needed for basic system security and stability.
- Step 2: Tailored Experiences. Toggle off the setting for “Tailored experiences.” This prevents Microsoft from analyzing the diagnostic data to offer personalized tips, recommendations, and advertisements based on user activity.
- Step 3: Delete History. Users should click Delete under the “Delete diagnostic data” section to remove any usage information that may have been collected since the clean installation.
- Step 4: Other Privacy Settings: Further review should include disabling features such as “Online speech recognition” and “Activity history” to prevent the collection of voice commands or browsing activity data.
6.4 Quick Performance Optimizations for a Snappy PC
A clean install provides a fast system baseline, but fine-tuning can enhance responsiveness.
- Disable Startup Apps: Use Task Manager (CTRL + SHIFT + ESC) to examine the “Startup apps” tab. Disable any non-essential applications that automatically launch upon system boot, as these are a common source of slow boot times and resource drain.
- Power Settings: Review power settings (often under Settings > System > Power & battery) to ensure they align with usage. On high-performance systems, verifying that the device uses a performance-oriented power plan can prevent thermal throttling or unnecessary sleep modes.
- File Explorer View: Adjust File Explorer settings to open to “This PC” (instead of the default Home view) and enable the viewing of file extensions and hidden files, which is helpful for technical file management.
- Taskbar Cleanup: Minimize clutter and resource usage by removing non-essential items like the search box, Task view, and Widgets from the taskbar.
Part VII: Security Deep Dive: Windows Defender
7.1 The Built-In Advantage: Windows Defender and Antivirus
Windows Defender Antivirus is the native, free security solution built into Windows 11. It provides comprehensive, real-time protection against malware, ransomware, and phishing attempts, backed by a tightly integrated firewall. For the vast majority of consumers who maintain safe online habits, Microsoft Defender is considered generally sufficient. Its primary advantage is its seamless integration and lightweight design, ensuring minimal performance impact on the new system compared to older, heavier third-party suites.
7.2 Windows Defender vs. Third-Party Antivirus: Which is Right for You?
The choice between Windows Defender and a premium third-party antivirus depends less on basic competence and more on the user’s risk profile and requirement for advanced features.
- Performance vs. Features: Defender is optimal for users seeking a free, lightweight solution with minimal system impact for everyday tasks like browsing and streaming. Third-party solutions, while having improved their efficiency, often provide demonstrably stronger detection capabilities against complex, evolving zero-day threats.
- Feature Suite: Defender provides essential anti-malware and network protection. However, many premium third-party packages bundle additional critical security features such as integrated VPNs, password managers, identity theft monitoring, and cross-platform protection (for macOS, Android, iOS devices) that Defender lacks.
- Web Protection Gaps: Some analysis suggests that Defender’s web and phishing protection, while good, may sometimes be less comprehensive than top premium solutions and is largely reliant on the user operating within the Microsoft Edge ecosystem.
7.3 When to Consider a Third-Party Solution
Third-party solutions are recommended for users who handle sensitive materials (e.g., online banking, business files) or who require a broad feature set beyond core anti-malware protection. Furthermore, for users who are less technically aware or are more susceptible to common security mistakes (e.g., social engineering, clicking malicious links), the layered defense, advanced threat detection, and broader feature set of a high-quality, third-party product can provide a valuable additional layer of protection against human error.
Part VIII: Troubleshooting Common Installation Issues
Even when following steps precisely, hardware-specific issues can halt the installation. The most common complex failures usually relate to drive visibility or partition standards, often requiring intervention via the Command Prompt (Shift + F10).
8.1 Fix: “Windows cannot find any drives” (Missing Storage Drivers)
Problem: On many modern laptops and desktop motherboards (especially those with newer Intel CPUs), the integrated storage controller—such as Intel Rapid Storage Technology (IRST) or Volume Management Device (VMD)—is not natively recognized by the standard Windows 11 installation media. This results in the drive selection screen appearing blank, preventing installation.
Solution (Loading Driver): The user must manually load the appropriate storage driver.
- Ensure the necessary IRST/VMD driver (downloaded proactively from the manufacturer’s website) is extracted to the installation USB drive.
- At the drive selection screen, click the [Load driver] option.
- Select **** and navigate to the folder on the USB drive containing the specific storage driver files (e.g., the RST folder).
- Select the driver file and click [Next] to inject it into the setup process. The drives should then become visible.
Alternative Solution (BIOS Modification): If driver loading fails, the user may need to reboot and enter the BIOS/UEFI setup (often F2 or Del key). In the BIOS, locate the VMD Setup Menu (often under Advanced settings) and explicitly select **** for the VMD controller. Saving and exiting the BIOS should allow Windows setup to see the drives upon the next boot, though this may impact advanced RAID capabilities.
8.2 Fix: MBR/GPT Partition Errors
Problem: If the installation halts with the message, “The selected disk has an MBR partition table. On EFI systems, Windows can only be installed to GPT disks,” it means the physical drive is formatted using a legacy standard incompatible with modern Windows 11 UEFI booting.
Solution (DiskPart Wipe and Convert): This procedure is highly destructive as it permanently erases all data on the target drive and must only be performed after a verified backup.
- At the error screen, press Shift + F10 to open the Command Prompt.
- Type diskpart and press Enter.
- Type list disk and press Enter. Carefully identify the number of the target disk (e.g., Disk 0) based on its size.
- Type sel disk [disk number] (e.g., sel disk 0).
- Type clean and press Enter. This command immediately erases all partition data on the selected disk.
- Type convert gpt and press Enter to convert the disk structure to the required GPT standard.
- Type exit twice to close DiskPart and Command Prompt.
- Click Refresh on the Windows setup screen. The disk should now appear as single “Unallocated Space,” ready for installation.
8.3 Installation Error Codes
Many installation failures are categorized by specific error codes.
- Driver Errors (0xC1900101): Errors starting with 0xC1900101 (e.g., 0xC1900101 – 0x2000c) typically point directly to driver conflicts, usually related to incompatible Chipset, Storage, or Graphics drivers. If these errors occur, the immediate action is to ensure the latest OEM drivers are either loaded during setup or installed immediately post-setup, replacing the generic Windows versions.
- General Errors (0x8007000d, 0x800705b4): These codes often indicate problems such as corrupted installation files, internal update cache issues, or time-out errors. Troubleshooting involves ensuring sufficient disk space, running disk error repair tools, and temporarily removing any residual third-party security software if it remains on a secondary partition.
Part IX: Conclusion and Next Steps
By following this detailed guide, the user has successfully executed a comprehensive clean installation of Windows 11 24H2. This process ensures the system is running at peak performance, free from legacy clutter, and configured with necessary security and privacy precautions. The initial time investment in creating a robust backup, verifying the boot media, and executing the critical partitioning steps guarantees long-term system stability.
A Note on Upgrading from Windows 10
It is important to reiterate that this guide prioritized the clean installation method—a complete wipe of the system drive. This approach is optimal for performance and system hygiene.
For users who wish to transition from Windows 10 to Windows 11 23H2 without erasing their personal files, applications, and settings, an In-Place Upgrade is available. While convenient, the upgrade carries the risk of inheriting existing software conflicts or system instability from the previous operating system.
A separate, dedicated resource detailing the prerequisites, compatibility checks, and step-by-step procedures for performing an In-Place Upgrade from Windows 10 to Windows 11 is published in this guide, How to Upgrade from Windows 10 to Windows 11 23H2.
